

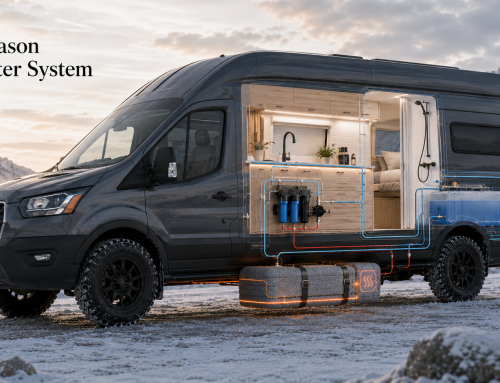
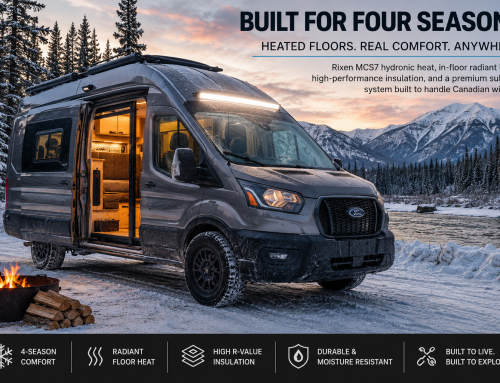
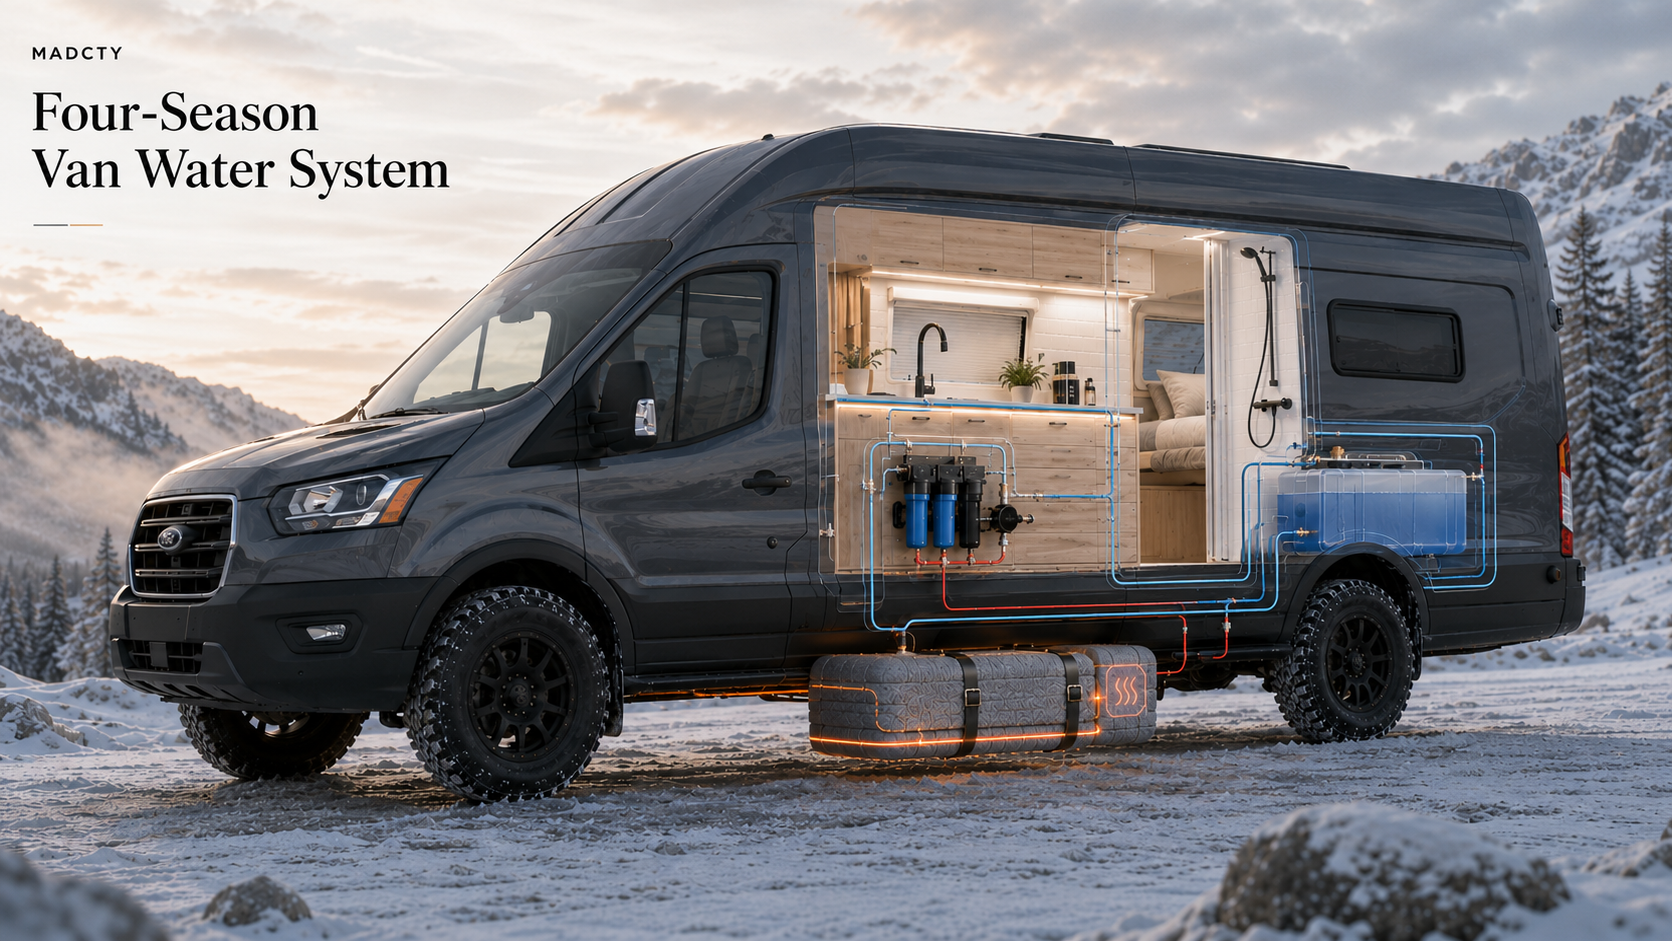
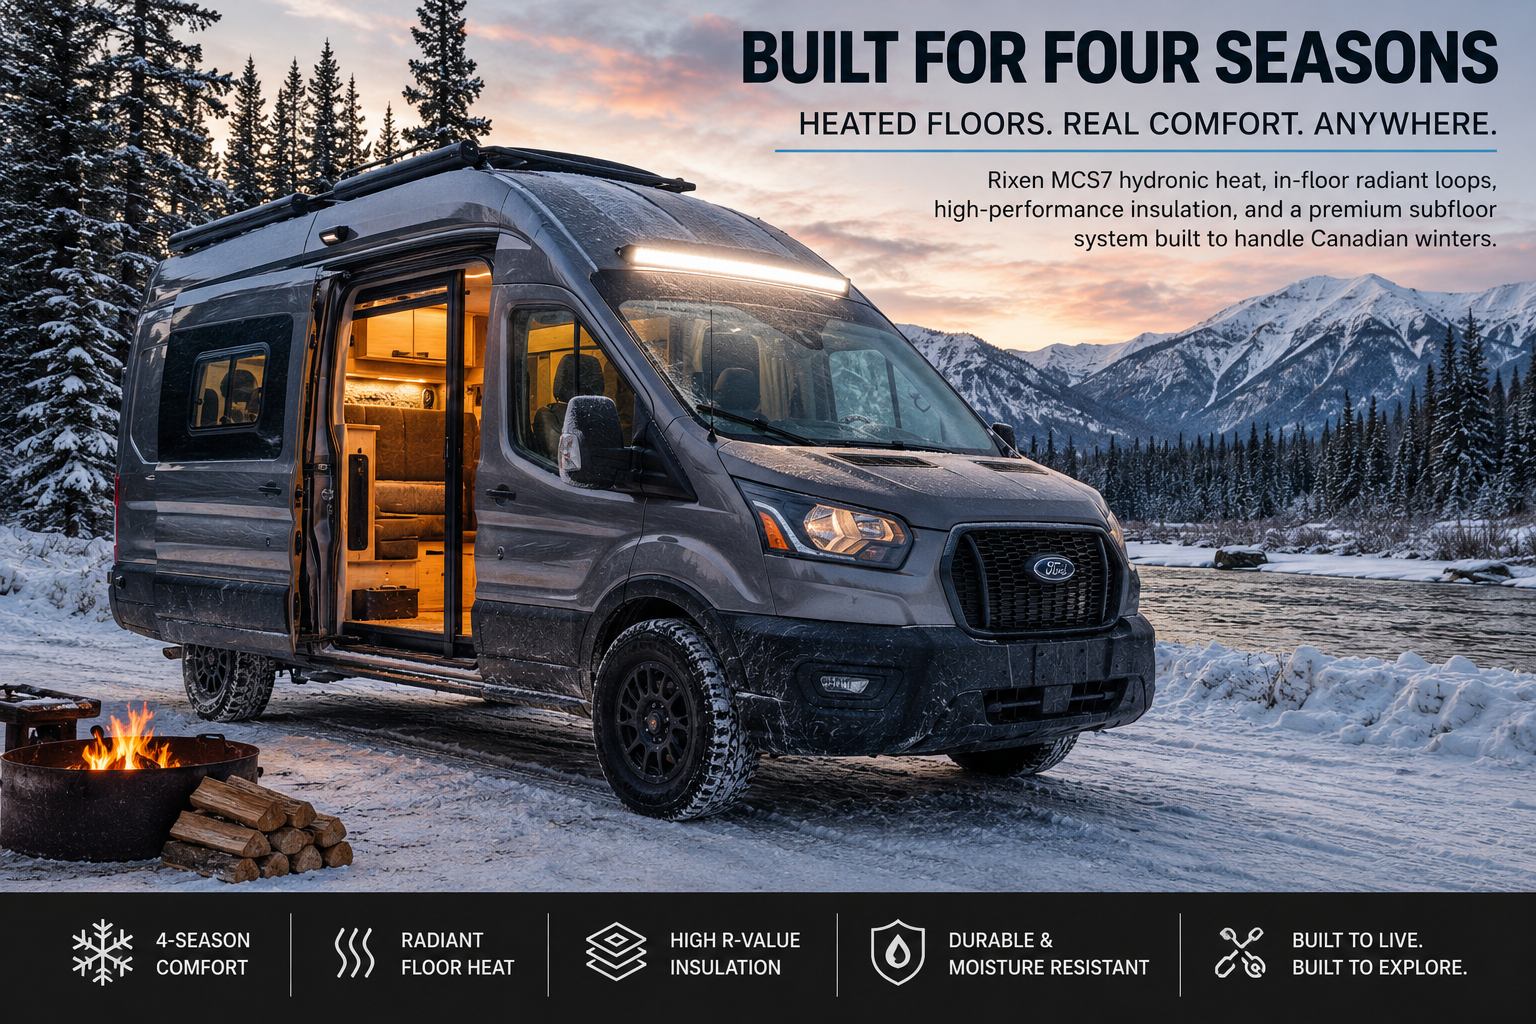
Insulation for Real Winter Van Use (and Real Summer)
A No-Nonsense Van Envelope That Works at –35 °C and +49 °C (–31 °F to 120 °F)
Most van insulation advice is built around mild climates. A “cold night” is 20°F. Condensation is a foggy window.
That advice breaks down completely when you’re parked on the Canadian prairies at –35 °C with wind, or in Arizona in July at 120°F.
This article outlines a hybrid insulation system that:
-
Survives true prairie winter
-
Handles hot desert summer
-
Manages condensation instead of pretending it won’t happen
-
Avoids spray foam risks (panel warping, trapped moisture)
-
Still allows you to mount cabinetry safely
We’ll assume:
-
2026 Ford Transit AWD High Roof Extended
-
Minimal windows (1 sliding door window, 1 rear-side awning window, 1 bed skylight)
-
No bulkhead between cab and living space
-
Radiant floor + hydronic heat + fan coils
-
Mini-split AC + roof fan
The Core Truth (Before Materials)
Heat loss and condensation are driven by air movement first, insulation second.
If warm, moist interior air can reach cold metal:
-
It will condense
-
It will rot things
-
R-value won’t save you
So this system is built around four principles:
-
Airtight to the metal skin
-
Continuous insulation across ribs
-
Moisture-tolerant materials
-
Controlled drying paths (ventilation + temperature control)
Target Performance (Realistic, Not Marketing Numbers)
| Surface | Effective Target (after thermal bridging) |
|---|---|
| Roof | R-12 to R-15 |
| Walls | R-10 to R-13 |
| Floor | R-10 to R-20 |
| Windows | Minimize + insulated covers |
This is excellent performance in a van. Going higher yields diminishing returns unless you also reduce glass and air leakage.
The Hybrid Assembly (No Spray Foam)
WALL ASSEMBLY (Exterior → Interior)
1. Metal Skin (Factory)
-
Already a Class I vapor barrier
-
Cannot dry outward
-
Must never be exposed to interior air
2. Thin Thermal Break on Ribs (Critical)
Material:
-
1/8”–1/4” closed-cell foam tape (EVA / EPDM / Armaflex)
Why:
Steel ribs conduct cold directly inward. This isolates interior framing and prevents “ghost condensation lines.”
3. Continuous Foam Layer (Primary Control Layer)
Material options (pick one):
-
Polyiso rigid board (best R per inch, warm climates)
-
XPS rigid board (better cold-temp performance, more moisture tolerant)
Thickness:
-
1”–1.5” ideal
Install method:
-
Cut tight
-
Adhere to metal with low-expansion adhesive (not spray foam)
-
Seal every seam with foil tape or compatible sealant
👉 This layer does 80% of the work:
-
Air barrier
-
Thermal barrier
-
Vapor control
4. Cavity Fill (Secondary Insulation)
Material:
-
Thinsulate SM600L or
-
Mineral wool (if well restrained)
Purpose:
-
Adds R-value
-
Dampens sound
-
Tolerates moisture without collapsing
⚠️ This layer must not be relied on for air sealing.
5. Interior Service Layer (Mounting + Wiring Zone)
Material:
-
1/2” plywood or composite panels mounted to isolated furring
This creates:
-
A place to run wires
-
A mounting surface
-
No fasteners through the foam into metal
6. Interior Finish
-
Paneling, fabric, or composite
-
Permeable is fine — drying is inward, not outward
ROOF ASSEMBLY (Same Philosophy, Higher Priority)
Roofs fail first in winter.
Upgrade from walls by:
-
Increasing foam thickness to 1.5”
-
Paying extreme attention to fan/skylight cutouts
-
Adding insulated plugs for every opening
FLOOR ASSEMBLY (Wind-Exposed, Do Not Skimp)
1. Factory Metal Floor
-
Seal every penetration
-
No exposed fasteners
2. Continuous Rigid Foam
-
1.5”–2” XPS or Polyiso
-
Seams sealed
-
No gaps at edges
3. Radiant Floor Plates + PEX
-
Aluminum transfer plates improve comfort and efficiency
-
Radiant floor ≠ primary heat source (comfort layer)
4. Subfloor (Plywood or Composite)
-
Mechanically fastened only to isolated hard points
-
Never crush foam unintentionally
WINDOWS, VENTS & SKYLIGHT — PRESSURE TESTED
Windows are the weakest point. That’s okay if you treat them honestly.
Your Window Set (Good Choice)
-
1 sliding or awning door window
-
1 rear-side awning window
-
1 bed skylight
-
Front cab glass (unavoidable)
What This Requires:
WINTER (-35 °C)
-
Interior insulated window plugs
-
Reflectix alone is not insulation
-
Use multi-layer: foam + radiant + air gap
-
-
Magnetic or compression-fit covers
-
Skylight plug is mandatory
-
Expect some condensation → manage it
SUMMER (120 °F)
-
Exterior reflective covers
-
Stop solar gain before it enters
-
-
Interior covers alone are not enough
-
Roof fan + mini-split must exhaust heat
Cab Integration (No Bulkhead)
This increases:
-
Heat loss
-
Cooling load
But also:
-
Improves airflow
-
Reduces condensation dead zones
Required upgrades:
-
Insulated windshield + cab window covers (winter & summer)
-
Controlled airflow from rear to front
-
Do not rely on factory dash HVAC for rear comfort
Does This System Work in Arizona?
Yes — and better than most builds.
Why:
-
Continuous foam limits heat soak
-
Reduced glass limits solar gain
-
Mini-split + roof fan removes heat efficiently
-
Interior materials tolerate high temp swings
Key summer additions:
-
Exterior window covers
-
Light-colored roof finish (or coating)
-
Shading whenever possible
Materials Shopping List (High Level)
Insulation & Air Control
-
Polyiso or XPS rigid foam boards
-
Foam tape for ribs
-
Foil HVAC tape (UL listed)
-
Low-expansion adhesive
-
Thinsulate or mineral wool
Windows & Covers
-
Insulated window plug materials
-
Exterior reflective covers
-
Skylight insulated insert
Mounting & Structure
-
Isolated furring strips
-
Rivnuts or bonded hard points
-
Plywood service panels
DO NOT DO THIS (Seriously)
❌ Spray foam directly on large exterior panels
❌ Leave steel ribs unbroken
❌ Install interior poly vapor barrier
❌ Rely on Reflectix alone
❌ Fasten cabinetry through insulation into metal
❌ Assume condensation “won’t be an issue”
Attaching Furniture Without Breaking the System
Rule:
Furniture mounts to structure, not skin.
Best methods:
-
Bonded hard points
-
Rivnut rails isolated with foam tape
-
Floor-anchored cabinetry tied into subfloor
This preserves:
-
Airtightness
-
Thermal continuity
-
Serviceability
Final Takeaway
This insulation strategy is:
-
Cold-climate legitimate
-
Moisture tolerant
-
Summer capable
-
Repairable and inspectable
-
Compatible with hydronic radiant heat
It is not the lightest, cheapest, or fastest.
But it is what holds up when the wind is howling at –35 °C — and when you’re parked in Arizona wondering why everyone else’s van feels like an oven.
Related Posts


Sign up with your email and always get notifed of Avada Lifestyles latest news!

